A tour of the panel
Every screen in the panel shares the same structure. It's worth recognising it once: after that, every section works the same way.
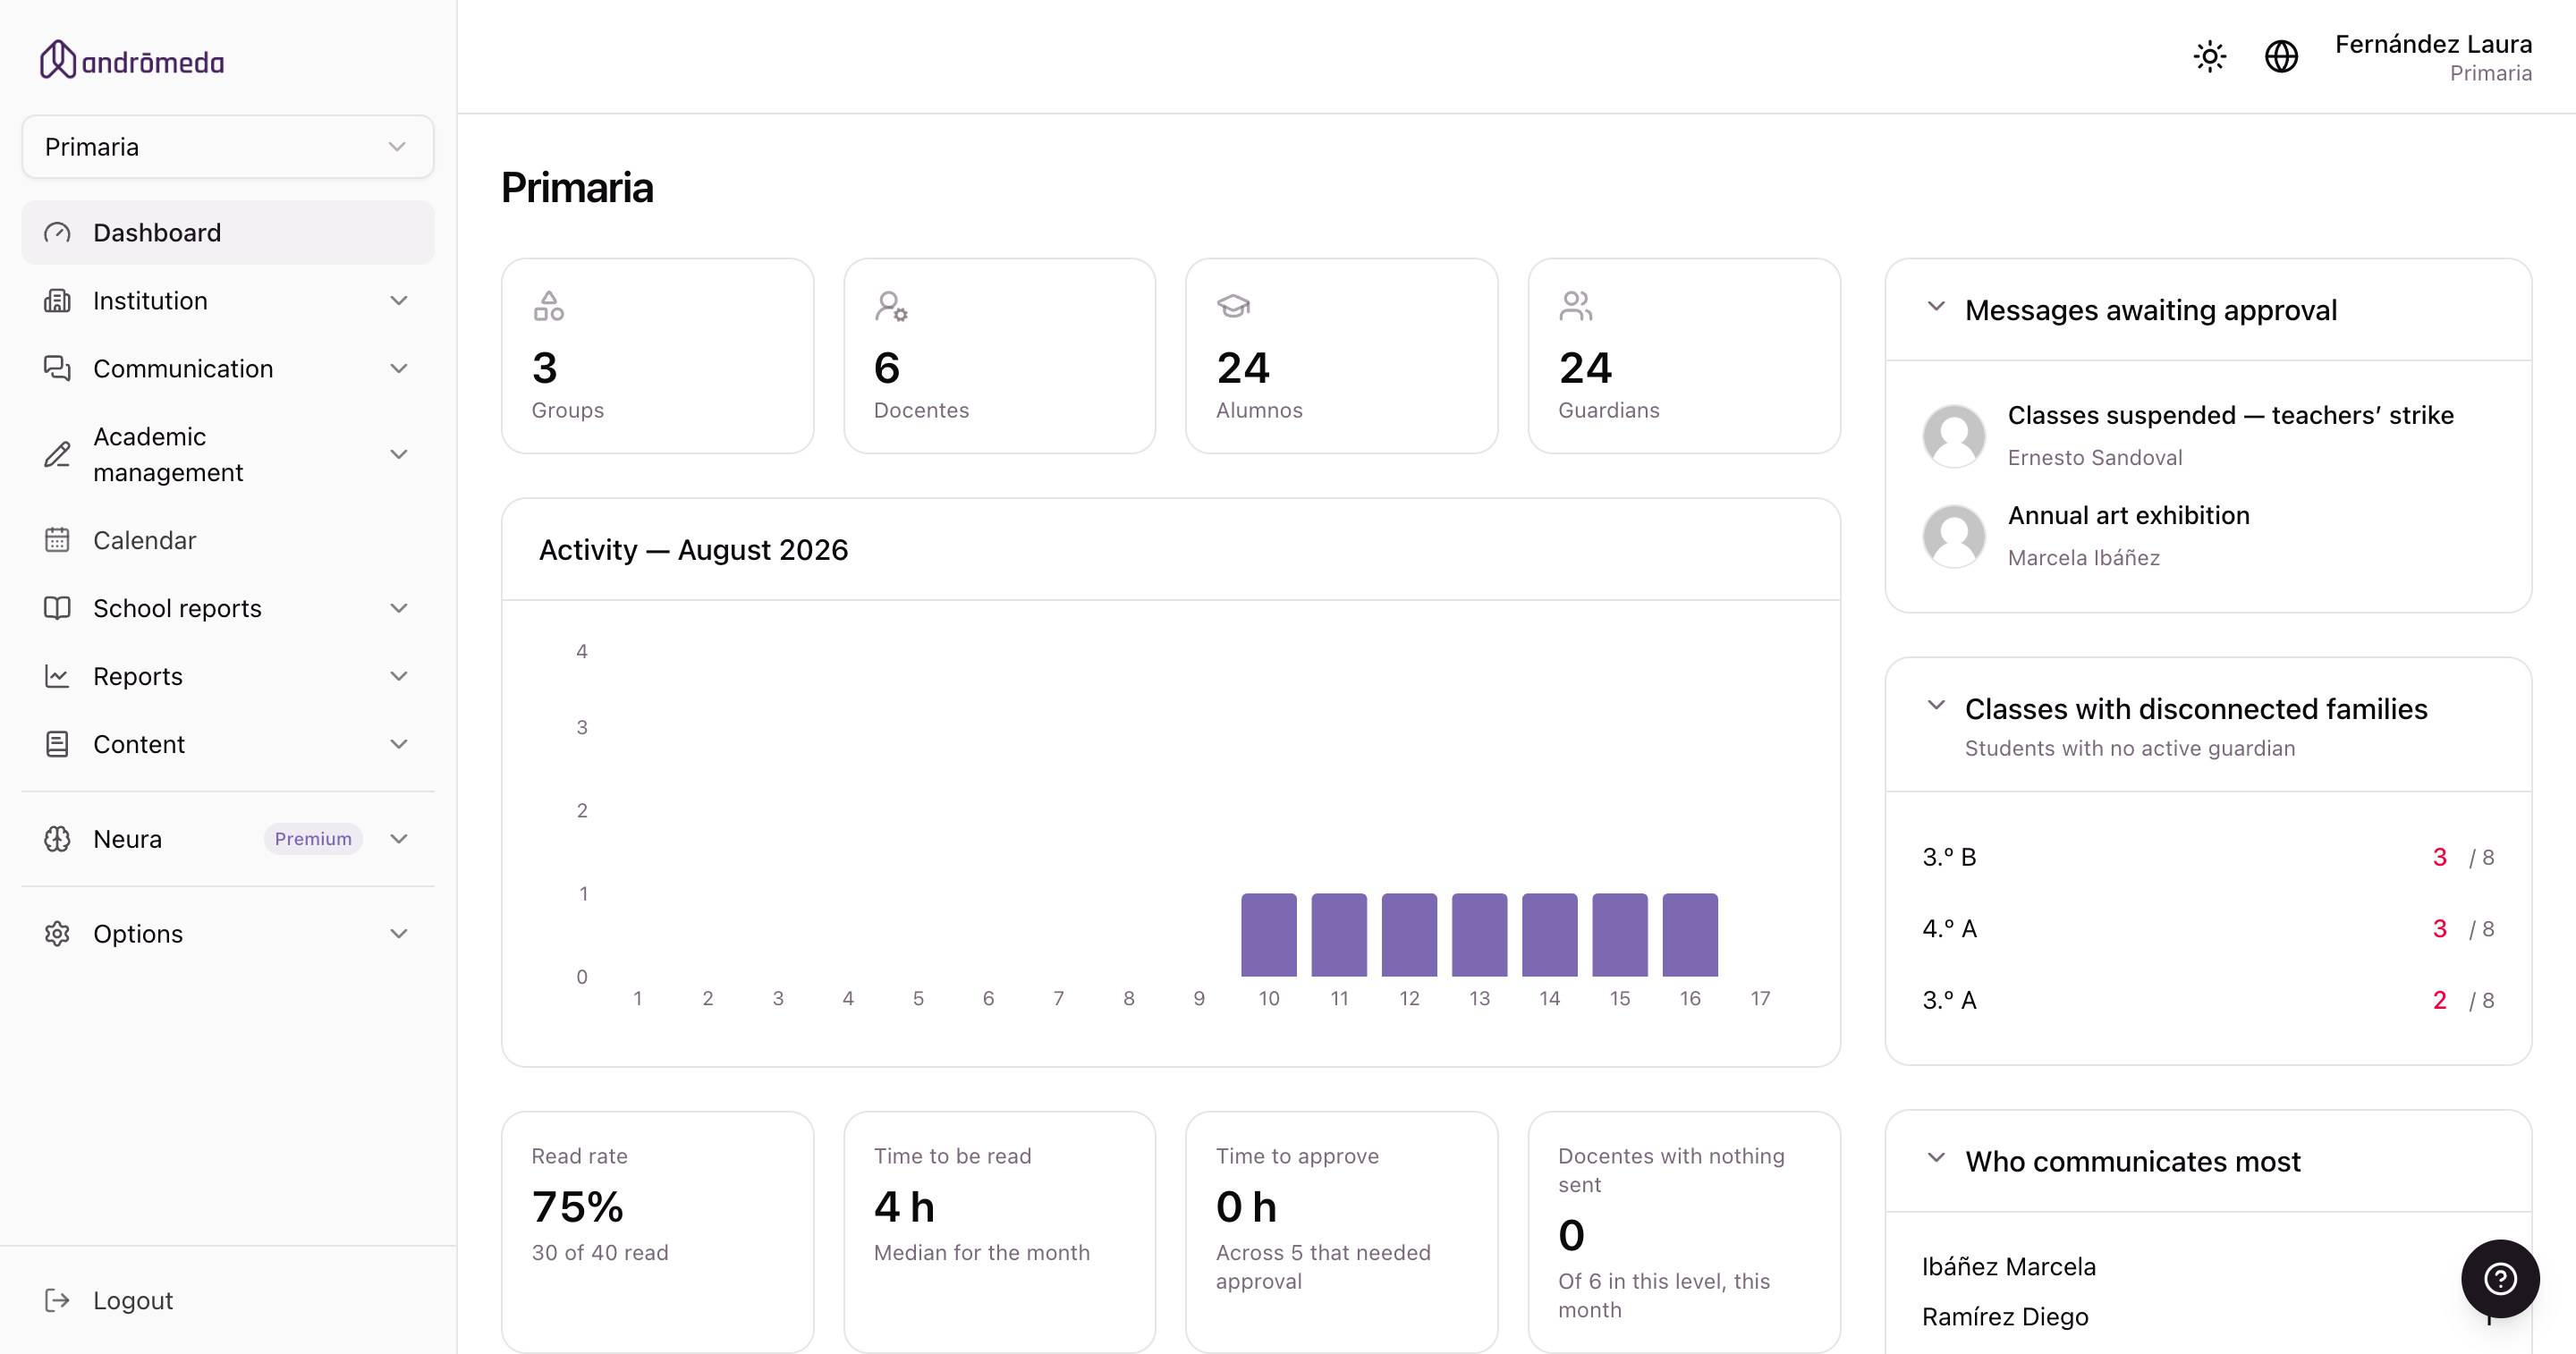
The three areas of the screen
The side menu
On the left. It's how you navigate, and at the very top it has the selector that says what you're working on.
The top bar
Along the top. Light or dark theme, language and your user name.
The content
The middle. Whichever screen you're on, with its title and help button.
The selector: what you're working on
This is the most important thing to understand about the panel, and the most common source of confusion.
Because each level is a separate world, the panel is always standing in one of them. What you see under Groups, Students or Messages belongs to that level and nothing else.
The selector sits above the side menu, and that's where you switch.
If you administer the whole school, you'll also see an option called Manage school. That's a different mode:
| When you're in… | What the menu shows |
|---|---|
| Manage school | School-wide things: Levels, Users, Settings, Billing. |
| A level | That level's day-to-day: Groups, People, Communication, Report cards, Content, Reports. |
You see the school menu or the level menu, depending on where you're standing. If you're looking for Groups and can't find it, you're in school mode: pick a level in the selector.
Someone who administers a single level isn't shown the selector, because there'd be nothing to choose between. Instead, the level's name appears under your name.
The top bar
From left to right:
- The menu button (☰), on small screens only, to open and close the side menu.
- The sun or moon, to switch between light and dark theme. It's remembered for next time.
- The globe, to switch the panel's language between Spanish, English and Portuguese.
- Your name, with the level you're working in underneath, and the school logo.
The help button
Many screens have a help button next to the title. Tapping it opens a short explanation of what that screen is for and what you can do on it, written in the same tone as this documentation.
It's the fastest way to settle a doubt without leaving where you are.
If a screen doesn't have the button, it's because its help hasn't been written yet. It doesn't mean anything is wrong.
Lists
Almost every section is a list, and they all work the same way:
- The search box at the top matches on any of the columns. It ignores case and accents, so "Perez" finds "Pérez".
- Column headers sort when clicked.
- The pencil on each row opens the record for editing.
- Export downloads the full list as an Excel spreadsheet.
- The button at the top right —"New group", "New event"— creates one.
When a list is empty you don't get a blank table, but a message explaining what's missing, and often a button to add it.
Forms
They open in a window over the screen you were on, so you don't lose your place.
- Missing required fields are flagged when you try to save, and the screen scrolls to the first one so you don't have to hunt for it.
- Multi-option dropdowns —groups, guardians— have a search box: type part of the name to filter.
- Some fields appear and disappear depending on what you choose elsewhere. That's intentional: a hidden field isn't required.